> ## Documentation Index
> Fetch the complete documentation index at: https://docs.levelrail.com/llms.txt
> Use this file to discover all available pages before exploring further.
# Back up Postgres to S3 and test the restore
> Send Postgres backups to S3, R2, or any S3-compatible bucket on a schedule, verify them, and prove the restore works on your own server.


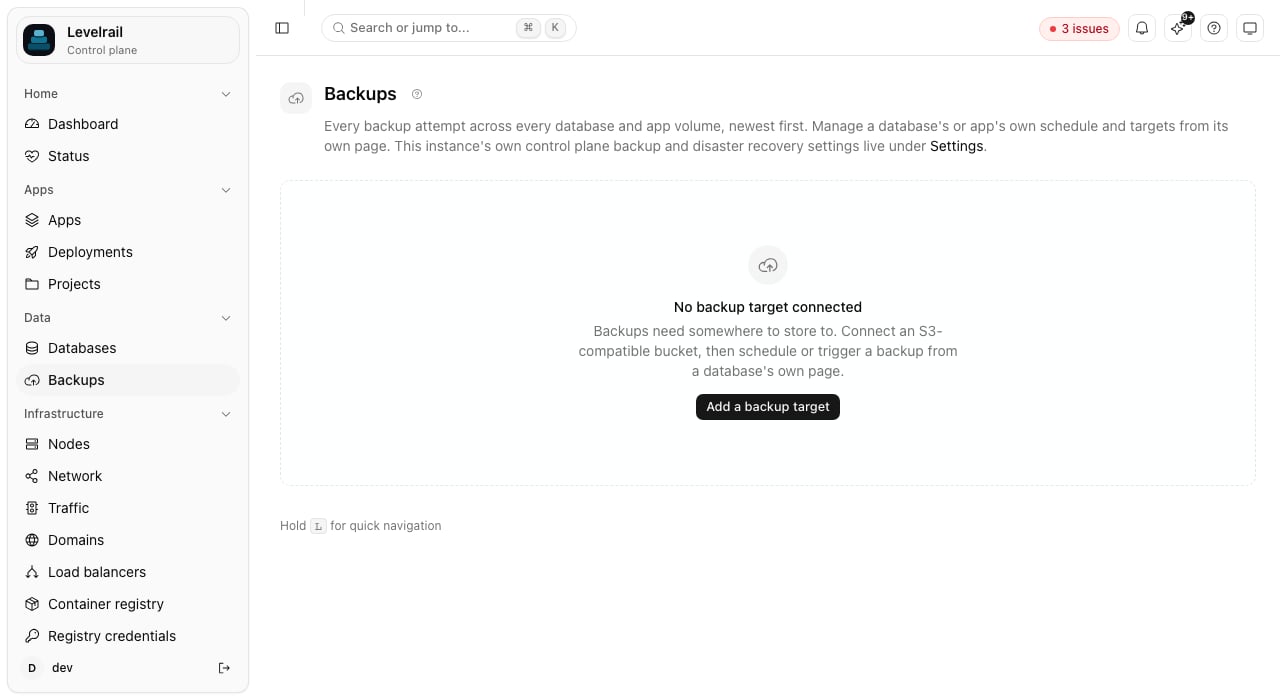
A backup you have never restored is a guess. In this tutorial you will connect an S3-compatible bucket, take a backup of a real Postgres database, schedule the next ones, delete data on purpose, and bring it back two ways: over the original database and into a brand-new copy.
## Before you start
* A running Levelrail instance and the CLI logged in to it ([installing](/installing)).
* A Postgres database. Create `main-db` as in [Connect an app to Postgres](/tutorials/connect-an-app-to-postgres), or use your own.
* A bucket and an access key pair with read and write access. AWS S3, Cloudflare R2, Backblaze B2, and MinIO all work.
```bash theme={"dark"}
levelrail-cli backup-targets create \
--name offsite \
--provider custom \
--endpoint https://s3.example.com \
--region us-east-1 \
--bucket my-backups \
--access-key-id "$ACCESS_KEY" \
--secret-access-key "$SECRET_KEY"
```
```text theme={"dark"}
backup target "offsite" (id bkt_Ra-kILVUyJaw, provider custom) connected
```
`--provider` is `aws`, `r2`, or `custom`. For `r2` and `custom`, `--endpoint` is required; for `aws` it is not. Credentials are write-only: Levelrail never returns them after you save them.
Test the connection now, so a bad key shows up today and not at 3am:
```bash theme={"dark"}
levelrail-cli backup-targets test bkt_Ra-kILVUyJaw
```
```text theme={"dark"}
backup target "bkt_Ra-kILVUyJaw" connected successfully
```
 Put something in the database so you can tell whether a restore worked. The `docker exec` commands in this tutorial run on the server that hosts the database:
```bash theme={"dark"}
docker exec db-main-db psql -U main-db -d main-db \
-c "create table notes(id serial primary key, body text); insert into notes(body) values ('first note'),('second note');"
```
Then trigger a backup:
```bash theme={"dark"}
levelrail-cli backups trigger main-db --target bkt_Ra-kILVUyJaw
levelrail-cli backups list main-db
```
```text theme={"dark"}
ID TARGET STATUS SIZE STARTED FINISHED
bkh_4cyttV-ZZ3kp bkt_Ra-kILVUyJaw succeeded 1999 2026-10-05T02:23:29Z 2026-10-05T02:23:29Z
```
```bash theme={"dark"}
levelrail-cli backups schedule set main-db \
--target bkt_Ra-kILVUyJaw \
--cron "0 3 * * *" \
--retain 7
```
This takes a backup at 03:00 every day and keeps the newest seven. `--retain-days` prunes by age instead, and the two limits work independently. Setting a schedule replaces any earlier one for that database.
```bash theme={"dark"}
levelrail-cli backups verify main-db --backup bkh_4cyttV-ZZ3kp
levelrail-cli backups verifications main-db --backup bkh_4cyttV-ZZ3kp
```
```text theme={"dark"}
ID STATUS CHECKSUM SIZE FORMAT
bkv_FY0ZygdKOLdV passed ok ok ok
```
Verification downloads the object again, recomputes its checksum, and compares size and format against what was recorded when the backup was taken. It also runs automatically after every backup.
Simulate a mistake:
```bash theme={"dark"}
docker exec db-main-db psql -U main-db -d main-db -c "drop table notes;"
```
Restore from the backup. Restoring overwrites the database, so you must type its name to confirm:
```bash theme={"dark"}
levelrail-cli backups restore main-db --backup bkh_4cyttV-ZZ3kp --confirm main-db
levelrail-cli backups restores main-db
```
```text theme={"dark"}
ID BACKUP STATUS STARTED FINISHED ERROR
rsh_TDdbpDDv8iYN bkh_4cyttV-ZZ3kp succeeded 2026-10-05T02:24:41Z 2026-10-05T02:24:41Z -
```
```bash theme={"dark"}
docker exec db-main-db psql -U main-db -d main-db -tc "select count(*) from notes;"
```
The count is `2` again.
Overwriting is the right call when you are recovering. To inspect old data without touching the live database, restore into a copy:
```bash theme={"dark"}
levelrail-cli backups restore-as-new main-db --backup bkh_4cyttV-ZZ3kp --new-name main-db-copy
levelrail-cli backups clone-restores main-db
```
Wait for the status to read `succeeded`, then query `main-db-copy`. The live database was never touched.
**Older releases**
Up to `v0.2.0-beta.15`, a restore into a new database could fail with `database "..." does not exist` because it started before the new Postgres had finished initializing. It is fixed in later releases. On an older one, delete the copy with `levelrail-cli databases delete main-db-copy` and run the restore again.
## Clean up
```bash theme={"dark"}
levelrail-cli databases delete main-db-copy
levelrail-cli backup-targets delete bkt_Ra-kILVUyJaw
```
Keep the target if you want to keep the schedule running.
## Where to go next
* [Back up an app's data volumes](/tutorials/self-host-vaultwarden#back-up-the-data): the same target also protects app volumes.
* [Backups and storage](/backups-and-storage): retention, instance-wide visibility, and how schedules are stored.
* [Control plane backup](/control-plane-backup) and [disaster recovery](/disaster-recovery): protect Levelrail's own state.
This documentation is built and hosted on [Mintlify](https://mintlify.com), a developer documentation platform.
Put something in the database so you can tell whether a restore worked. The `docker exec` commands in this tutorial run on the server that hosts the database:
```bash theme={"dark"}
docker exec db-main-db psql -U main-db -d main-db \
-c "create table notes(id serial primary key, body text); insert into notes(body) values ('first note'),('second note');"
```
Then trigger a backup:
```bash theme={"dark"}
levelrail-cli backups trigger main-db --target bkt_Ra-kILVUyJaw
levelrail-cli backups list main-db
```
```text theme={"dark"}
ID TARGET STATUS SIZE STARTED FINISHED
bkh_4cyttV-ZZ3kp bkt_Ra-kILVUyJaw succeeded 1999 2026-10-05T02:23:29Z 2026-10-05T02:23:29Z
```
```bash theme={"dark"}
levelrail-cli backups schedule set main-db \
--target bkt_Ra-kILVUyJaw \
--cron "0 3 * * *" \
--retain 7
```
This takes a backup at 03:00 every day and keeps the newest seven. `--retain-days` prunes by age instead, and the two limits work independently. Setting a schedule replaces any earlier one for that database.
```bash theme={"dark"}
levelrail-cli backups verify main-db --backup bkh_4cyttV-ZZ3kp
levelrail-cli backups verifications main-db --backup bkh_4cyttV-ZZ3kp
```
```text theme={"dark"}
ID STATUS CHECKSUM SIZE FORMAT
bkv_FY0ZygdKOLdV passed ok ok ok
```
Verification downloads the object again, recomputes its checksum, and compares size and format against what was recorded when the backup was taken. It also runs automatically after every backup.
Simulate a mistake:
```bash theme={"dark"}
docker exec db-main-db psql -U main-db -d main-db -c "drop table notes;"
```
Restore from the backup. Restoring overwrites the database, so you must type its name to confirm:
```bash theme={"dark"}
levelrail-cli backups restore main-db --backup bkh_4cyttV-ZZ3kp --confirm main-db
levelrail-cli backups restores main-db
```
```text theme={"dark"}
ID BACKUP STATUS STARTED FINISHED ERROR
rsh_TDdbpDDv8iYN bkh_4cyttV-ZZ3kp succeeded 2026-10-05T02:24:41Z 2026-10-05T02:24:41Z -
```
```bash theme={"dark"}
docker exec db-main-db psql -U main-db -d main-db -tc "select count(*) from notes;"
```
The count is `2` again.
Overwriting is the right call when you are recovering. To inspect old data without touching the live database, restore into a copy:
```bash theme={"dark"}
levelrail-cli backups restore-as-new main-db --backup bkh_4cyttV-ZZ3kp --new-name main-db-copy
levelrail-cli backups clone-restores main-db
```
Wait for the status to read `succeeded`, then query `main-db-copy`. The live database was never touched.
**Older releases**
Up to `v0.2.0-beta.15`, a restore into a new database could fail with `database "..." does not exist` because it started before the new Postgres had finished initializing. It is fixed in later releases. On an older one, delete the copy with `levelrail-cli databases delete main-db-copy` and run the restore again.
## Clean up
```bash theme={"dark"}
levelrail-cli databases delete main-db-copy
levelrail-cli backup-targets delete bkt_Ra-kILVUyJaw
```
Keep the target if you want to keep the schedule running.
## Where to go next
* [Back up an app's data volumes](/tutorials/self-host-vaultwarden#back-up-the-data): the same target also protects app volumes.
* [Backups and storage](/backups-and-storage): retention, instance-wide visibility, and how schedules are stored.
* [Control plane backup](/control-plane-backup) and [disaster recovery](/disaster-recovery): protect Levelrail's own state.
This documentation is built and hosted on [Mintlify](https://mintlify.com), a developer documentation platform.